There are so many adorable Halloween decorations out there! The problem? For the most part, they are super expensive. Try making this witch hat and boo door hanger to add a touch of Halloween to your home, for an inexpensive price.

Supplies needed for the witch hat:
-Paper mache wich hat ($2.50 at local craft store)
-Ribbon of your choice
-Hot glue gun and glue
-Black spray paint
Instructions:

1. Completely spray paint the paper mache witch hat in the color black. Take extra care to ensure that you cover the outside, inside, and brim of the hat. I used my favorite spray paint, Plutonium Paint, in the color “Deep Space.” Because it contains 70% pigment, it only used one coat.
2. Wait until the paint dries between applications. It took about 5 minutes for me.
3. Glue the ribbon around the hat with a hot glue gun. For extra touch, fold the ribbon into a bow or design and glue this down as well.


Supplies needed for “Boo” door hanger:
-Wide ribbon
-Wood letters that spell out “boo”
– Wood cutout in banner shape
-Wood glue (optional)
-Black and white spray paint
-Hot glue gun and sticks
-Foam cut out of ghost
Instructions:
This craft may look hard, but it actually super simple. If you’re wondering where you can purchase wood lettering, many craft supply stores carry them for cheap. At my local store, the wood letters were only $0.49 a piece and the wood banner shape was only $1.

First, paint your wood letters white. I chose to use the color “Polar” by Plutonium Paint. For the banner that will go behind the letters I used “Deep Space” by Plutonium. Once all the wood pieces were done I used Elmer’s wood glue to ensure they stayed together.
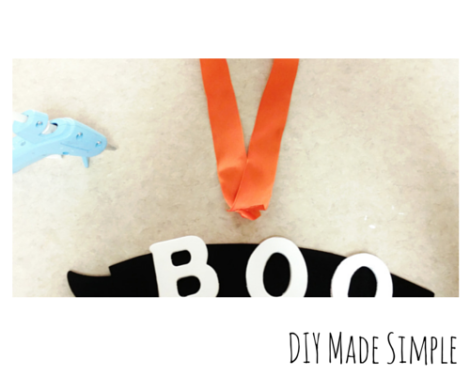
While the glue dried I cut my ribbon to the right size. Because I wanted to hang this on my front door I cut my ribbon about 10″ long and folded it in half. I glued each side to the back of the wood sign with a hot glue gun. Next, take another piece of ribbon about 5″ long and glue the top of the ribbon to the bottom of the wood sign. Take the other end of the string and glue it to the cut out of the ghost shape. The ghost cut out I used was foam and was on sale for only $1. I liked using a foam piece on this project because it wouldn’t weigh down the sign.

Make sure all the hot glue is completely hanging your project. Like this project? Be sure to “Pin it” on Pinterest and press the like button below.


[…] For step-by-step details on how to create this door hanger for only $3, click here. […]
Reblogged this on Plutonium™ Paint and commented:
Great DIY ideas for Halloween using Plutonium Paint!
That’s such a cute idea, the ‘Boo hanger’
Thank you! I love it because it can be easily folded up after the holiday season:)
[…] “Boo” Door Hanger […]